Remember when I decided to make the "shoes" for myself and my bridesmaids? Well, I made the demo set's and then mailed them all around the country to my girls so they could figure out which ones they wanted for their fabulous feet.
UPDATE: I actually wrote this ages ago (like October!) and for some reason, never posted it! Whoopsidaisies!
A few months later... I've got everyone's choice... and only 1 set of measurements. I had a couple of girls tell me "my foot's a size 9". ummm... Great. I can go BUY them shoes, but I can't make them!!! Click HERE to be reminded of how surprising it is that I have figured out how to make these in the first place.
Well, I have to start somewhere, so one set of measurements it is! Thus began my Saturday... and now begins my first attempt at how to DIY!!
Note: This makes the grand total of TWO pairs of these I have made. There may be better ways to do this, and I know there are better ways to photograph and explain this... but you aren't on Martha's blog, you're on mine... so bear with me! If you have any questions for clarification - just ask! (All photos courtesy of me!)
 Start with a fixed end, a la use a crimping bead. See how it looks like I'm using fishing wire? Its actually not, I used "stretch magic" because I wanted these to have a little give to 'em.
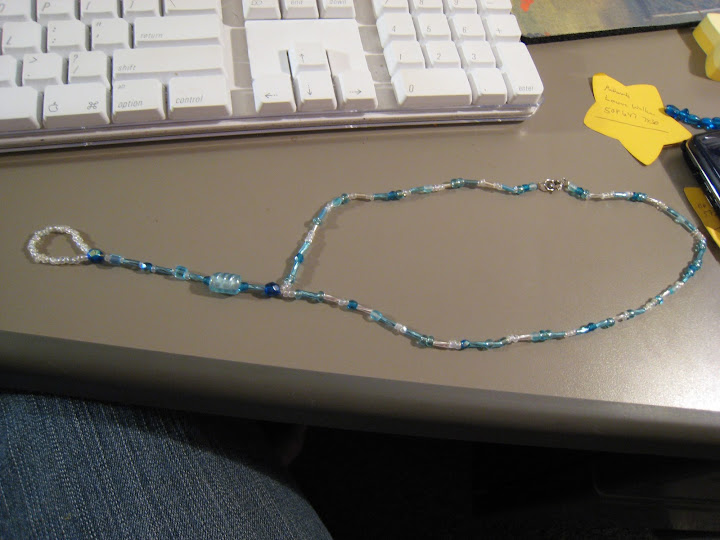
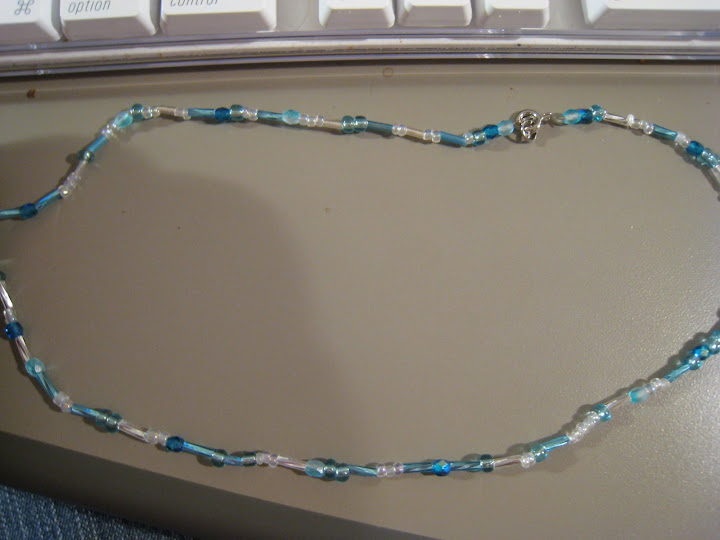 Continue adding beads in whatever pattern you like until you have a large loop that is twice the circumference of the ankle this is being fitted for. Add a clasp to the other end and you've essentially made a big ol necklace. Its the next step that makes it a shoe!
(Contrary to the picture, this doesn't have to be done need an apple keyboard. Though in my house, you are never that far from an apple keyboard. ) :)
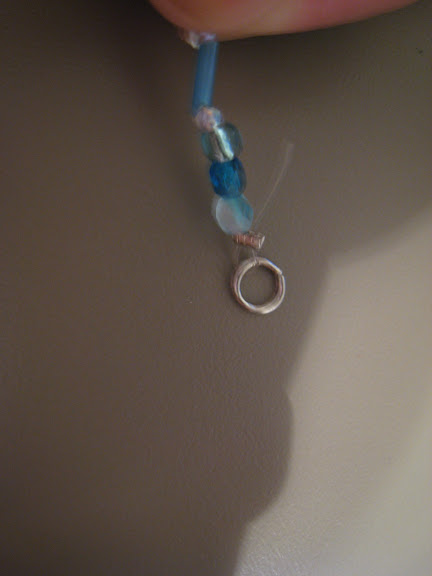
 Notice JUST below the big dark blue bead is a crimping bead. When I had enough tiny white beads for the toe loop, I crimped it off so that it was done and I didn't have to worry about it anymore. Plus, then I can put it on my foot and figure out how long the top part is/needs to be. Hint: Always use little bitty beads for the toe loop - much higher comfort quotient!
Continue beading the straight line that will run up the top of your foot until you have the desired length. (I think this length is the most crucial to get right.) Just because I thought it looked nice, somewhere in the middle of each top line, I added a much larger bead to stand out. End this line wiht a crimping bead - DON'T CRIMP IT YET - just string it on.
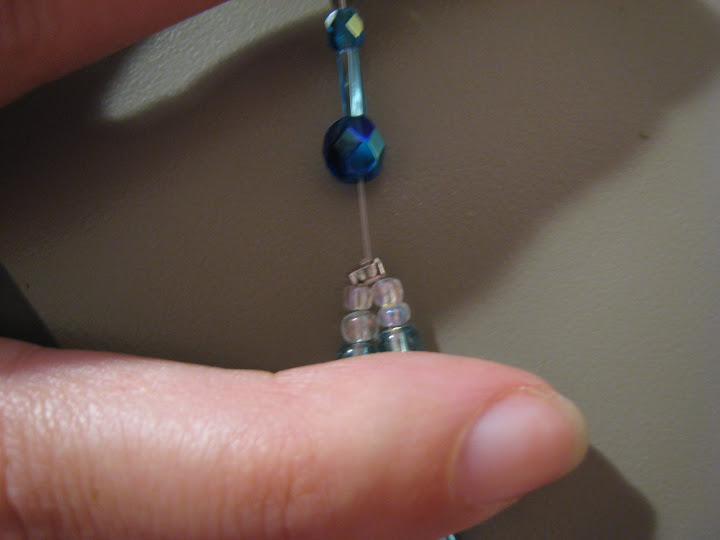
 So now you have a big 'ol loop, and a small loop at the end of the straight line of beads. Put the loop on your ankle with the clasp towards the back. Find the beads that will be at the front of your ankle. This is where the top line will intersect and be hooked to the loop. Lightly stretch the beads apart so you have space take the tail end of the straight line, loop it around, and back through the crimping bead.
Now crimp that bead and everything should be connected!
 And this is what the finished product will look like.
Ta-da!
Ok - so my instructions sound confusing when typed! Just take it step by step and it really is pretty simple.
UPDATE: So as it turns out, its a zillion times easier to make one with the foot actually there with you. This ended up being the only pair I made by measurements. The remaining four I made within a month of the wedding, and the last pair being finished after the rehearsal dinner. While I had originally given them several options of style choices, I realized that I needed the foot in front of me, and this was the simplest style. So while each one was unique in beading etc, they were all this style. Rae captured such a cute shot of them all and it was even featured on Weddingbee.com's Gallery Photo of the Day!

Anyone else find that the actual DIY is much more simple than explaining it?!


3 comments:
i really think these are beaautiful! well done girl!!!!!
Great job! I fell in love with these about a month ago while planning my own beach themed wedding. I am from the Caribbean & we don't have this down here. I really want to learn how to make myself a pair, so any advise/help you can offer me would be greatly appreciated. Once again, excellent job on those.
My fiance and I are having a renaissance themed wedding and these will look GREAT with my dress. I'm also making some to go with my belly dancer outfit. :) These will look AMAZING! Thank you! :D
Post a Comment